Category

Insights

8tree announces integration with Dent & Buckle

By dentCHECK, Insights, Newsroom, Press


8tree announces its new integration with Dent & Buckle. This integration combines Dent & Buckle’s powerful defect management software and 8tree’s advanced surface inspection technology, creating a truly streamlined solution for the aviation industry.

This integration allows technicians to quickly link the measurement results and reports from dentCHECK with the relevant defect record raised within Dent & Buckle. The detailed Dent & Buckle reports will automatically include this dentCHECK information.


The integration aims to make it easier and faster for maintenance teams to assess, track, and manage aircraft structural defects with:

  • Greater Precision: 8tree’s ISO17025-accredited surface inspection tools provide precise measurements of surface damage, which are included in Dent & Buckle’s defect records.
  • Improved Efficiency: The integration facilitates rapid damage assessment and recording, reducing aircraft downtime and maintenance costs while increasing operational efficiency.
  • Detailed Reporting: The integration enables easy generation of detailed reports that include 3D visuals and exact measurements, simplifying communication with maintenance crews and regulatory authorities.

“It has been a fantastic experience to work with the 8tree team. We quickly realized that we provide complimentary solutions to the aviation industry and that by integrating them, we will deliver significant value to the market. I am looking forward to growing our ongoing collaboration”, said Michal Schutty, CEO of Dent & Buckle.

“Based on the experience of our dozens of aviation and aerospace customers, we see significant efficiency gains when maintenance teams digitalize their workflows. The future is digital, and it is connected. At 8tree, we follow the customer’s needs. The overlap of dentCHECK users and Dent & Buckle customers has been waiting for this integration. Good to see it being rolled out”, said Leonard Buck, Marketing Manager at 8tree.

About Dent & Buckle:

Dent & Buckle is a hassle-free, fully featured solution for managing aircraft structural defect records. It’s a truly mobile and web-based system with accurate 3D aircraft models and powerful reporting that easily integrates with your eTechLog, MRO, and document management systems. Thanks to its modern interface, it is intuitive to use and thus quickly adopted by engineering teams with minimal training effort. It has proven to deliver measurable benefits to aircraft operators, MROs, and lessors by reducing operational delays and limiting the number of AOG events, saving a considerable number of man-hours when compiling data about the condition of the aircraft structure, especially during the lease return process.

About 8tree

8tree tools, technology and services boost your production quality with precision 3D measurement that is as simple as taking a photo.

The dentCHECK platform is the world’s only handheld-portable, completely wireless 3D scanner tool with integrated AR that is purpose-built for the aviation maintenance industry and recognized by all major aerospace OEMs. It can also be found integrated into drones and robotic automation cells. Leading Airlines & MROs across the Commercial, Military, Cargo and Business aviation sectors use 8tree’s dentCHECK tool and 8tree’s dentCHECK-as-a-service for mapping aircraft damage and creating detailed SRM-compliant digital damage reports.

With integrated AR, dentCHECK empowers the aircraft technician with instant, actionable measurements for critical airframe damage while boosting consistency (25x) and efficiency (90% time-savings) and eliminating human-subjectivity, compared to traditional manual inspection methods.

For more information, visit 8-tree.com.
For recent news, follow 8tree on LinkedIn.


Download Press Release as PDF

AMC 2022 – dentCHECK vs. Traditional Methods

By Case Study, dentCHECK, Events, Insights

What is the Aerospace Maintenance Competition?
The Aerospace Maintenance Competition (AMC) is a 2-day competition held in conjunction with the annual MRO Americas organized by Aviation Week. It is a global get-together for the aerospace community to showcase, to compete, and to celebrate the skilled craft of aviation technicians. After a 2-year pause due to the COVID-19 pandemic, the AMC returned in 2022 with a bang. There were 73 teams from various categories – Commercial Airlines, Military, Repair & Manufacturing, and Schools. This year, 8tree and Alaska Airlines once again co-sponsored the “Airframe Damage Inspection” event, one of the 24+ events available at the competition.

What is the “Airframe Damage Inspection” event?

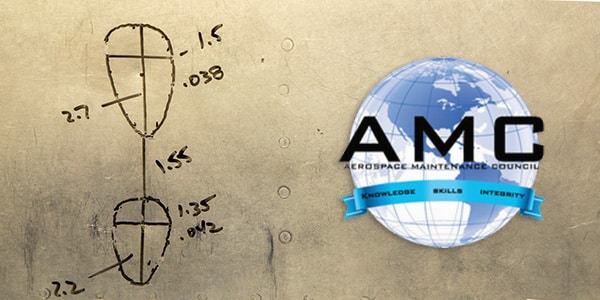
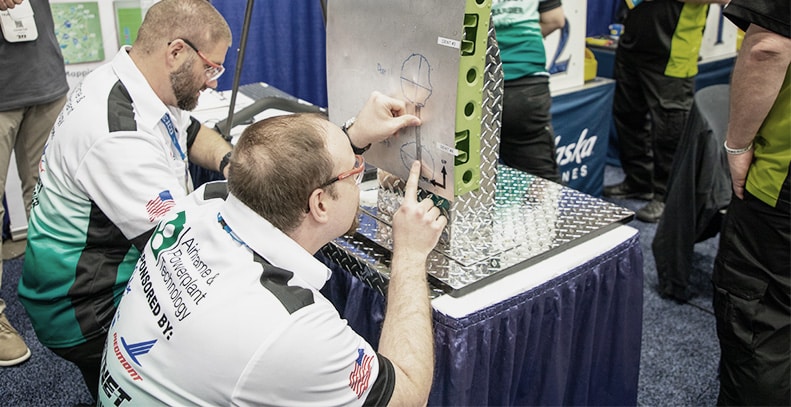
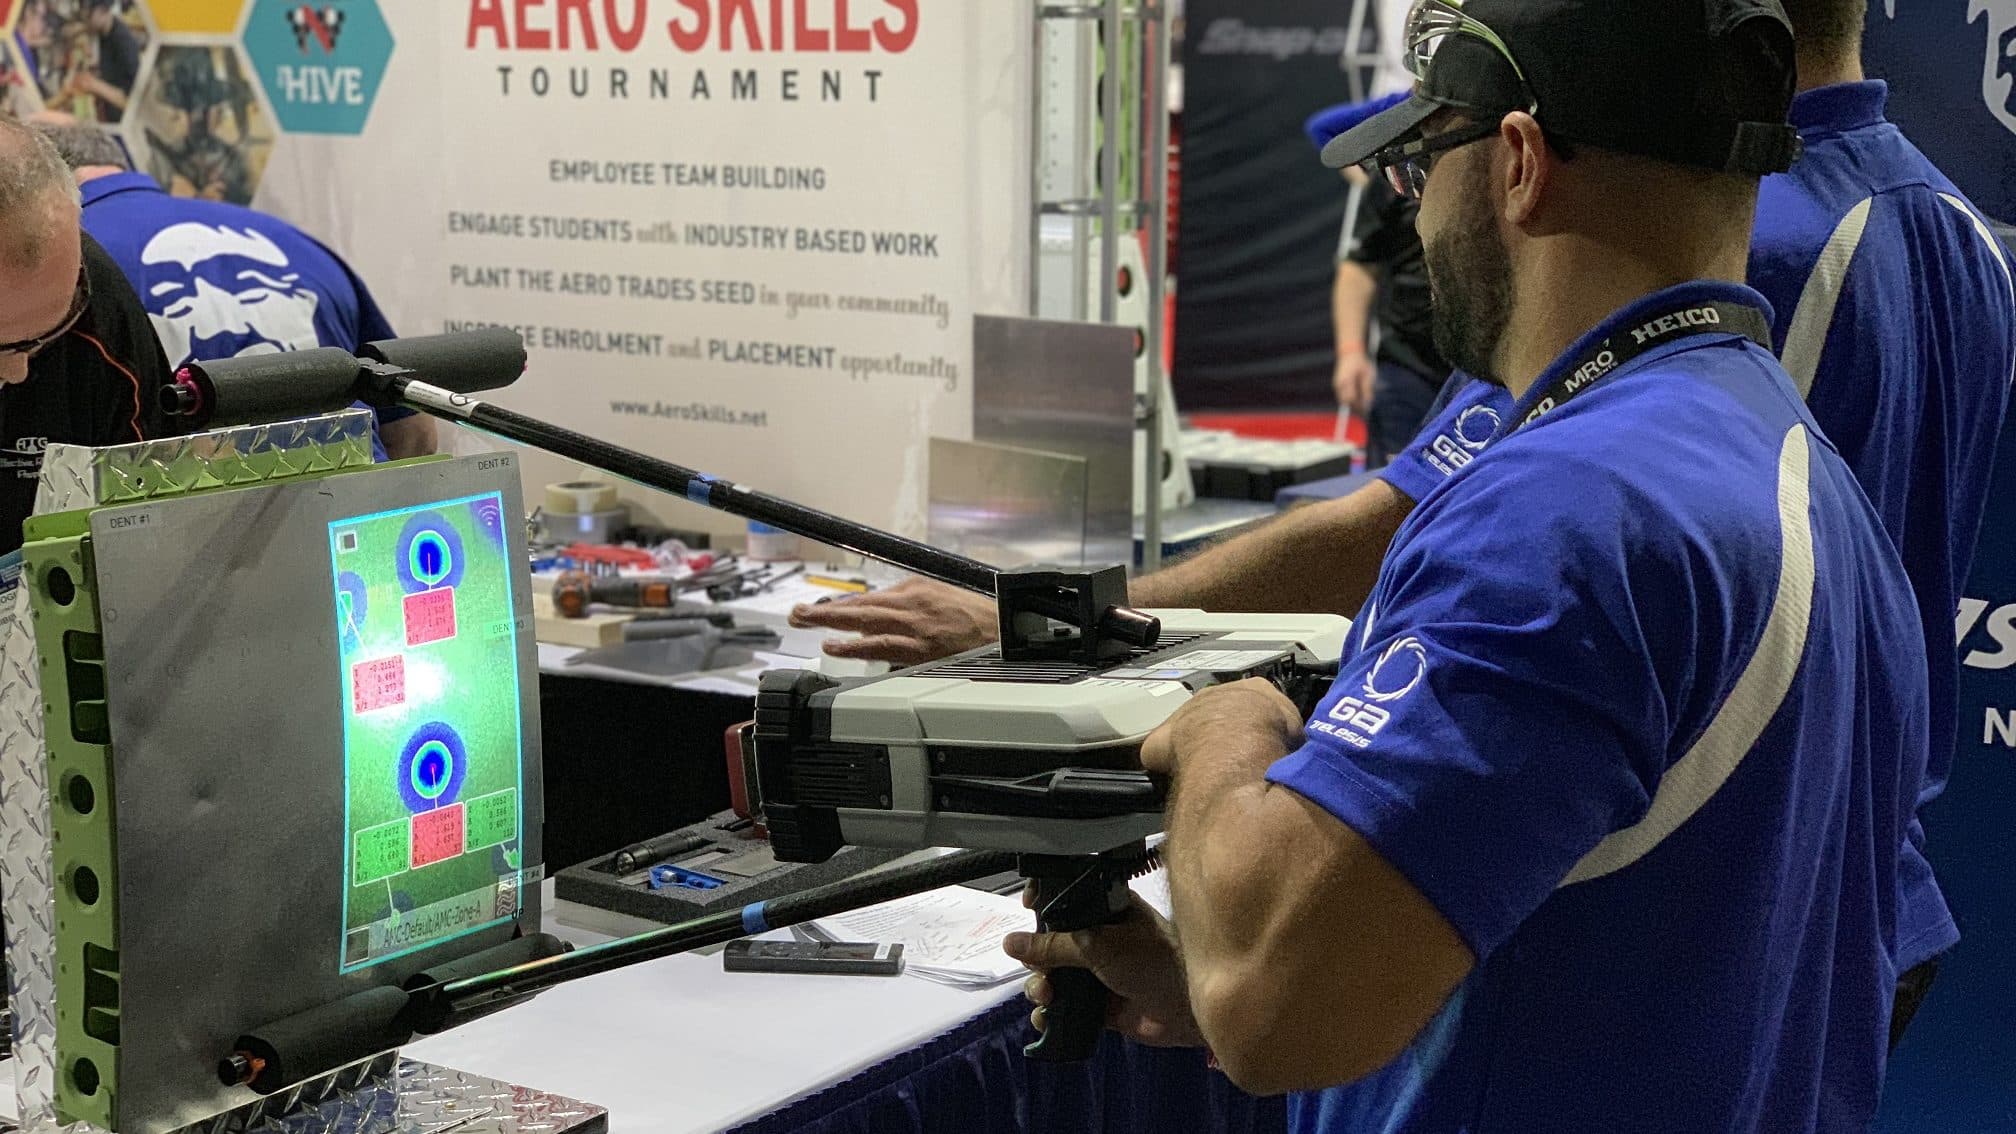
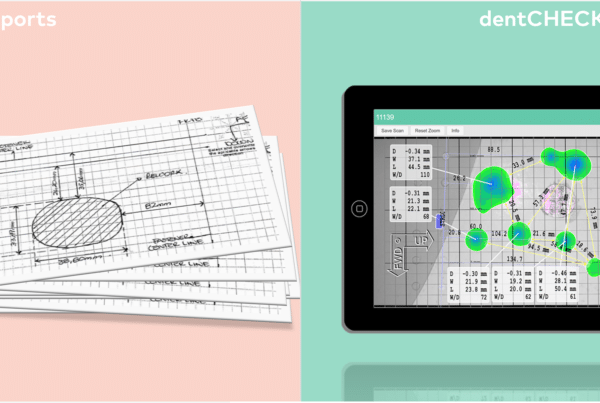
Simply put, the objective of the event is to – “Accurately map two dents using traditional methods, and then repeat the task using dentCHECK”. For the traditional method, competitors were provided with a: depth gauge, straight-edge ruler, flashlight, calculator, pen, and paper. Using these tools, they were required to map the dents, producing these measurements: Depth (Y), Width (A), Length (B), Critical Ratio (A/Y), and the distance between dents. Then, they had to transcribe these numbers on their ‘task card’ – similar to the traditional, paper-based records that the aviation industry still produces. Once they have completed this, they will use the dentCHECK tool to measure the same dents. This is a simple task – With one-click, the tool will measure all the aforementioned numbers, and instantaneously project the results back onto the surface. With the result superimposed on the physical damaged aircraft panel, competitors were able to see the measurements and make a decision, while the result remains in digital format.

How did the competitors fare against each other?

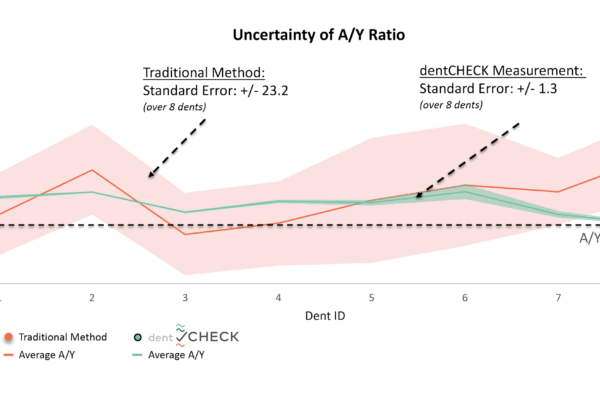
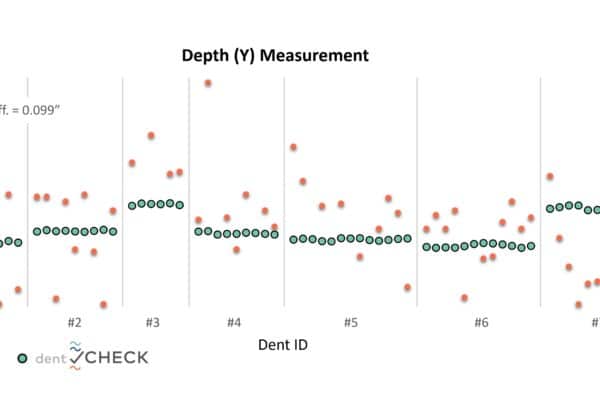
The performance of the competitors was widespread. Some completed the tasks in <5 minutes, while some were unable to complete the task within the allocated 15 minutes. Additionally, the precision of the measurement results was also widespread. For example, across 73 teams, the uncertainty of depth measurement using traditional method was +/- 0.016”. This means that one could measure depth of 0.050”, while another could measure up to 0.082”! This is a huge discrepancy that is plaguing the standards of aviation maintenance, and hence jeopardizing aviation safety. In contrast, when competitors use dentCHECK, the uncertainty was +/- 0.0008”, a 20x improvement when compared to traditional methods.

The results using Traditional Method is shocking. Why is this a problem?

During the competition, we observed 3 top errors that is contributing to this problem. First, incorrect tool handling will yield incorrect results. We observed some competitors incorrectly placed the depth gauge at an incorrect angle or position, while some fail to zero-out the tool properly. Additionally, the subjectivity of determining the starting and end point of a dent’s outline using the naked eye also contributes to this problem. Secondly, some competitors produced incomplete measurement, and skipped crucial steps necessary to produce accurate, complete measurement. Lastly, we observed many record-keeping errors. For example, to calculate the critical ratio, some competitors fail to type in the correct number on the calculator, hence producing bad measurement. In a fast-paced work environment like aviation maintenance, using these tactile tools will undoubtedly produce inaccurate measurement.

How similar is the competition to a ‘real-life’ aviation maintenance industry?
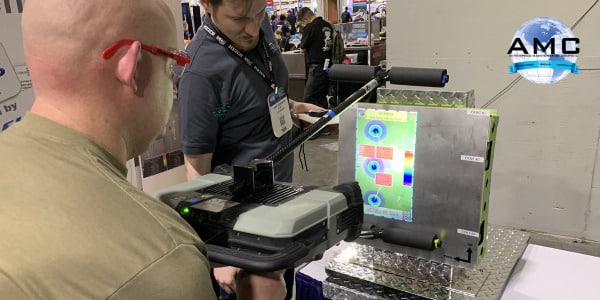
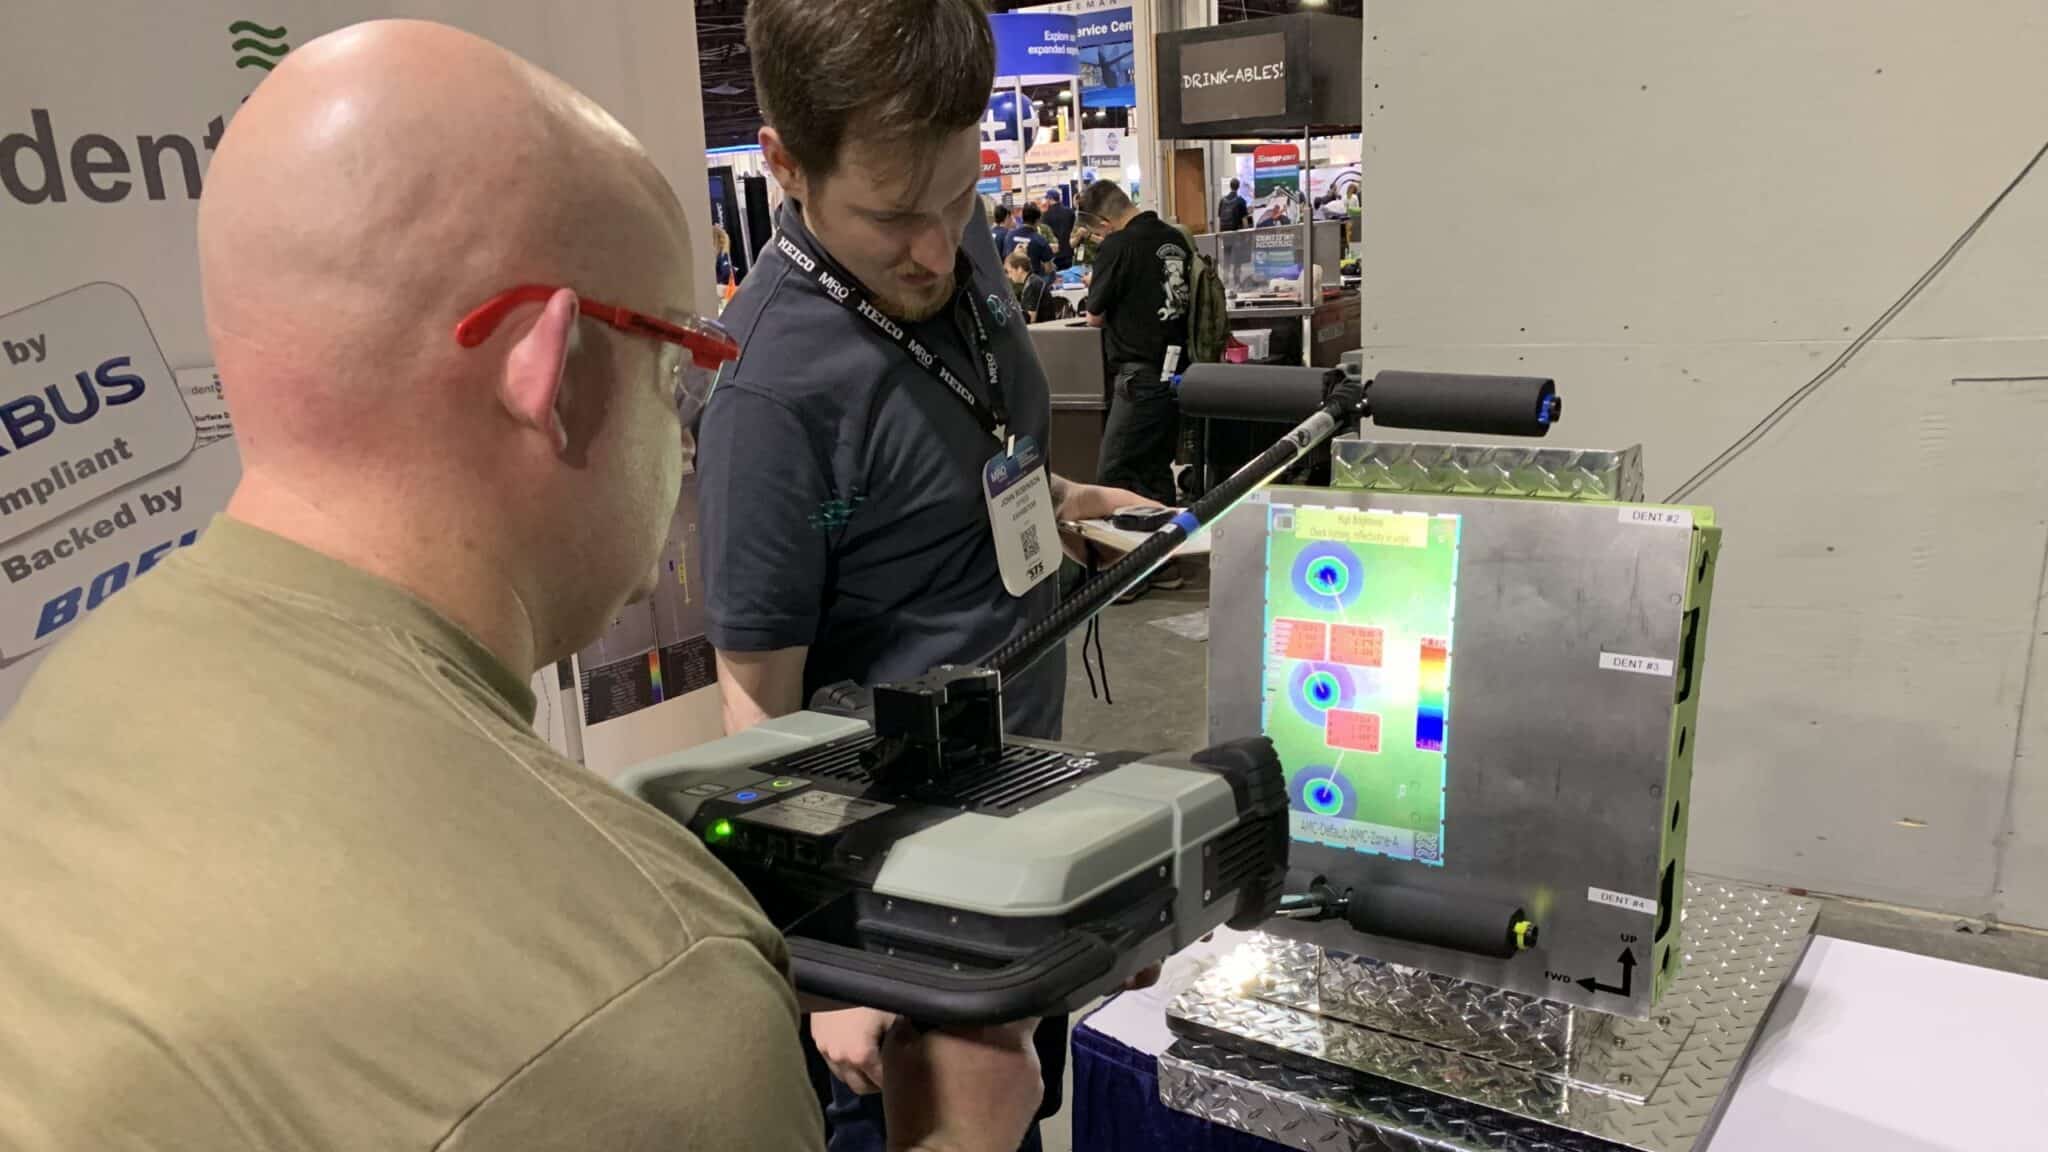
All the events at the competition were very relevant to the aviation maintenance industry. In this industry, turn-around-time (TaT) of an aircraft is of paramount importance. Aircraft maintenance technicians are not just tasked with doing the job right, but they have to perform under time pressure. The competition simulates just that when they only have 15 minutes to complete a certain task. In the “Airframe Damage Inspection” event, we create an opportunity for competitors to be equipped with a tool – dentCHECK – that will help them accomplish both objectives: (i) Accurately measure a dent-damage (ii) Do it in the fastest way possible. In this year’s competition, competitors took 8 minutes 49 seconds to map the dents using traditional method, but took only 11 seconds to map the dents using dentCHECK, a 48x faster inspection time. The competition provides a small snippet of the burden placed upon the maintenance technicians, and how continuous improvement and learning of new tools can help them become more efficient.

What are the benefits for airlines, MROs, and schools to participate in such competition?

The AMC was truly an engaging platform for aviation technicians to come together to exchange ideas and to get inspired. One of the big issues in the industry today is the aging workforce problem, whereby juniority across the workforce with limited exposure and experience may pose a threat to effective and timely maintenance of aircraft fleet in the future. 8tree hopes to bridge this gap of skillset between retiring workforce and new technicians by introducing technology that will simplify the cumbersome process of precision measurement. Additionally, the platform is a good avenue to build existing professional connection and to make new ones. You never know who you will meet at the competition!

Where can others find more about the key findings from this competition?

Some example measurement and photos can be found here. There you can find the detailed analysis of the competition results.

Supporting the Next Generation of Aviation Professionals with Technology

By Case Study, dentCHECK, Events, Insights

Do years of experience and skill level of aviation professionals affect the time taken to complete an inspection task?

The answer lies within the choice of tool used.

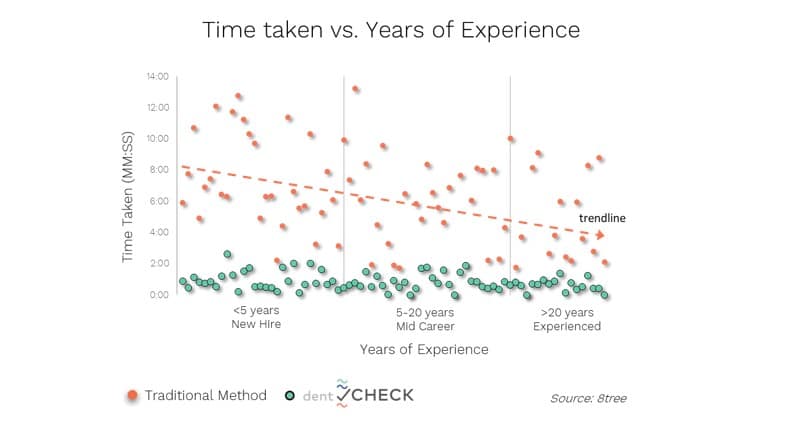
When using traditional manual methods, we saw that New Hires tend to complete an inspection task 33.3% slower than their Experienced colleagues (~7 minutes 30 seconds and ~5 minutes respectively). However, when using dentCHECK, years of experience and skill level have no influence on efficiency. Each experience and skill level group is able to complete the task in ~47 seconds when using dentCHECK, an 8x improvement when compared to traditional manual methods. Read on to learn more.

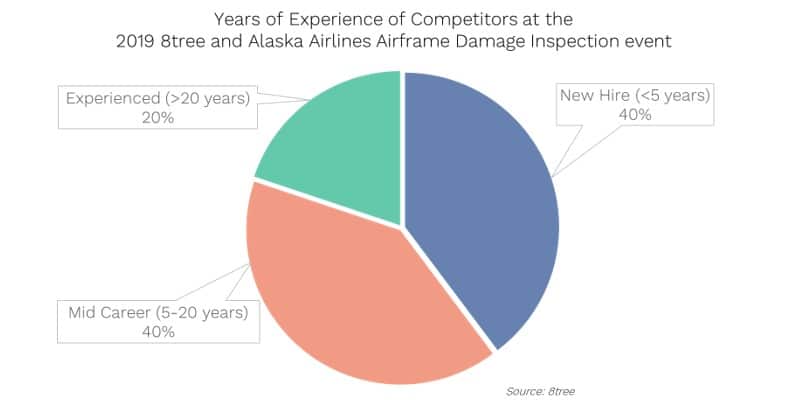
The 2019 AMC, held in conjunction with Aviation Week Network’s MRO Americas, witnessed 27 teams representing schools, 27 teams representing airlines/MRO/Manufacturing companies, and 27 teams representing the military. While the diversity of participants at the AMC is extensive, a majority of participants who participated in the Airframe Damage Inspection event represents those coming from “New Hire (<5 years-experience)” and “Mid-Career (5 – 20 years-experience)”.


So do years of experience and skill level affect the time spent to complete an inspection task? Using traditional manual methods, those with <5 years-experience (New Hires) completed the task in ~ 7 minutes 30 seconds, 33.3% slower when compared to those with >20 years-experience (Experienced), who completed the task in ~5 minutes. In contrast, when participants used dentCHECK to complete the inspection task, years of experience have no bearing on the time taken – Each experience group completed the task in ~47 seconds when using dentCHECK.


Retiring experienced maintenance professionals means that skillset that would traditionally take years to master (In this particular case, 20 years), now need to be mastered by new hires within a short amount of time. “dentCHECK is one of the more innovative pieces of hardware that I’ve seen. It should be a staple in every shop that works on aircraft”, said Trenton Blackwood, one of the student competitors from Team Tulsa Tech.

As the new generation of aviation technician – especially those still in schools – continue to view technology as a critical part of their life and work, 8tree hopes to play a much more involved role in supporting them by exposing them to advanced technology in the early stages of their career. This is accomplished by introducing dentCHECK into Part 147 schools, as well as creating opportunities for the aerospace community to experience dentCHECK at the upcoming Aerospace Maintenance Competition.

8tree is proud to once again host an event at the upcoming 2022 Aerospace Maintenance Competition. “The Aerospace Maintenance Competition is first and foremost a place where maintenance professionals showcase their ability and compete against each other. But it is also a place for the Aerospace Community to be together, to be inspired, and to celebrate the skilled craft of aviation technicians.”, said Howard Chung, 8tree’s lead in organizing the 8tree and Alaska Airlines Airframe Damage Inspection event.


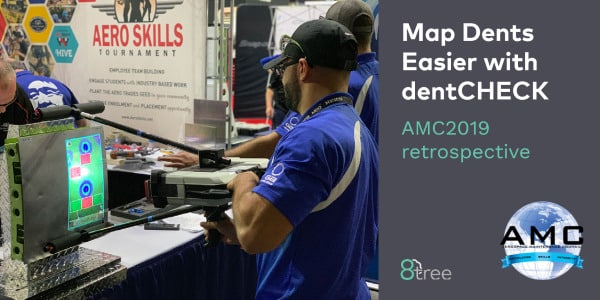
Zero Learning Curve: Map Dents Easier with dentCHECK

By Case Study, dentCHECK, Events, Insights

New technology for a decades-old problem: dentCHECK’s zero learning curve

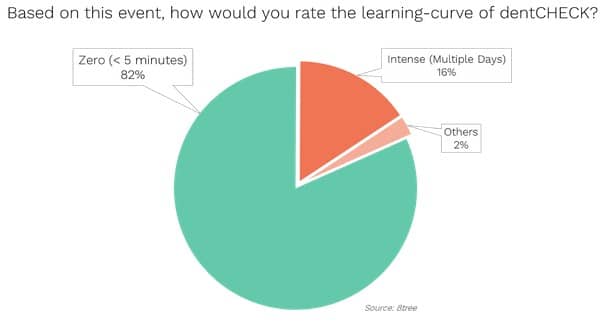
At the 2019 Aerospace Maintenance Competition, more than 150 engineers, technicians, and students discovered the efficiency and accuracy of dentCHECK. But what was their experience in using new technology to solve a decades old problem? 82% of competitors rated the learning-curve of dentCHECK as Zero (<5 minutes). Read on to learn more.

From its early days, 8tree’s vision is to make precision 3D measurement as easy as taking a photo. Guided by the principles of Simplicity, Speed, and Actionable Results, dentCHECK is designed to provide operators with actionable results within seconds. With one-click, dentCHECK measures dents on an aircraft surface, and superimposes the results onto the inspected surface, giving operators immediate feedback so they may determine the next course of action quickly.

In the 2019 AMC, each team was tested on a wide array of aircraft maintenance skills. There were more than 25 different tasks spanning from structural repair to avionics troubleshooting to taking a human factors awareness test! Each team had several weeks to prepare themselves with pages of tool manuals and process guidelines in order to excel in the competition. So how did competitors find the learning-curve and ease-of-use of dentCHECK?

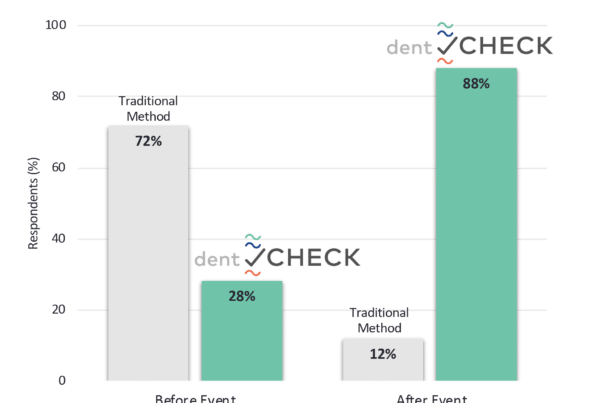
At the conclusion of the competition, competitors were surveyed to rate the learning-curve of dentCHECK. 82% of competitors rated the learning-curve of dentCHECK as Zero (<5 minutes). “Love this tool. It eliminates so much time and is very efficient. Have more dents to measure?”, said Candice McHargue, one of the competitors.

Back at AMC 2022: Airframe damage inspection event

You asked. We listened. After 2 years of the AMC being cancelled, 8tree is returning to the 2022 AMC with more dents to map, and with a newly added dentCHECK function that will be experienced first-hand by competitors this year. Stay tuned to learn more!

Read the entire AMC 2019 Case Study
Case StudydentCHECKEventsInsightsAMC 2022 – dentCHECK vs. Traditional Methods
16. October 2022

AMC 2022 – dentCHECK vs. Traditional Methods

What is the Aerospace Maintenance Competition? The Aerospace Maintenance Competition (AMC) is a 2-day competition held in conjunction with the annual MRO Americas organized by Aviation Week. It is a…
Case StudydentCHECKEventsInsightsSupporting the Next Generation of Aviation Professionals with Technology
19. April 2022

Supporting the Next Generation of Aviation Professionals with Technology

Do years of experience and skill level of aviation professionals affect the time taken to complete an inspection task? The answer lies within the choice of tool used. When using…
Case StudydentCHECKEventsInsightsZero Learning Curve: Map Dents Easier with dentCHECK
11. April 2022

Zero Learning Curve: Map Dents Easier with dentCHECK

New technology for a decades-old problem: dentCHECK's zero learning curve At the 2019 Aerospace Maintenance Competition, more than 150 engineers, technicians, and students discovered the efficiency and accuracy of dentCHECK.…
Case StudydentCHECKInsightsTick-tock, tick-tock. Accelerate Aircraft Inspection, Avoid Delays and Save Money
31. July 2019

Tick-tock, tick-tock. Accelerate Aircraft Inspection, Avoid Delays and Save Money

At the recent 2019 Aerospace Maintenance Competition (AMC), dentCHECK helped participating technicians complete an inspection task 8x faster, delivering higher efficiency when compared to using traditional manual methods. In addition,…
Case StudydentCHECKInsightsMake better decisions with measurements you can trust
5. July 2019

Make better decisions with measurements you can trust

Passersby couldn’t ignore the significance of data emerging from the recent 2019 Aerospace Maintenance Competition (AMC) #AMCAero.  It is tough to ignore that traditional manual measurements have 18x poorer measurement…
Case StudydentCHECKfastCHECKInsightsHow Did 100 Different Manual Measurements Stack Up?
12. June 2019

How Did 100 Different Manual Measurements Stack Up?

What do you uncover by analyzing hundreds of manual measurements of the same surface? The Truth. 8tree conducted the world’s most comprehensive study of dent-mapping in the aviation sector, at…
Case StudyInsightsAircraft hail-damage: What tools will aircraft maintenance crews use for the job?
29. April 2019

Aircraft hail-damage: What tools will aircraft maintenance crews use for the job?

What does an aviation technician do when their aircraft is pummeled by hail? To contrast traditional methods vs. emerging technology, more than 150 engineers, technicians, and students participated in a…

Large Area Hail Damage Mapping with dentCHECK

By dentCHECK, Insights

What do the New Mexico desert, Elvis Presley’s 1962 Lockheed JetStar, and 8tree have in common?

In 2001, the Roswell International Air Center (RIAC) in New Mexico started to offer commercial aircraft parking. Up to 800 aircraft can be parked in a more than 5,000-acre fenced areas. American Airlines, United, Air Canada, and several others temporarily park their aircraft here. RIAC is also home to Evis Presley’s Lockheed Jetstar!

However, there is no roof over this giant open-air parking lot, which leaves the aircraft exposed to catastrophic weather events, such as hail storms.

One such extreme hail-event occurred last year. Numerous aircraft at RIAC were severely damaged. 8tree’s dentCHECK was called in to expedite damage-mapping of several wide-bodies.

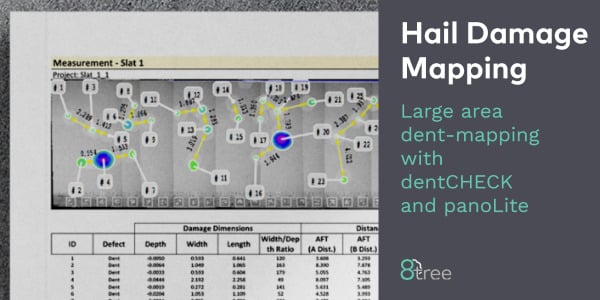
Taking advantage of dentCHECK’s new large area panoramic mapping functionality (“panoLite”) it took just days to map and report each aircraft, compared to the weeks or months taken by traditional methods.

Large area damage mapping with panoLite.

How does it work?

To enable the powerful panoLite capability, specially-designed and reusable ‘smart-rulers’ (panoLite tapes) are applied to outline the hail-affected areas of interest.

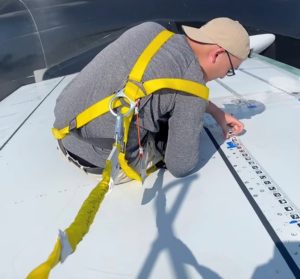
Applications Engineer Keith applying panoLite tapes on stabilizer.

The purpose of the panoLite smart-ruler is two-fold. First, the idea of the smart-ruler is a familiar one to aviation technicians, who currently follow an established workflow of applying masking tape marked with measurement increments to define an area of interest. Secondly, the smart-ruler is ‘smart’ and easy, as it only takes seconds to apply and peel off for re-use. Once applied, it delivers an incredibly efficient and seamless alternative to the traditional hail-mapping workflow, since it automatically communicates with the dentCHECK tool to create accurate large area damage-maps.

Once the panoLite smart-ruler has been applied, the familiar dentCHECK point-and-shoot dent mapping process can begin.

As long as some portion of the panoLite smart-ruler is visible to the dentCHECK tool during a given scan, then the well-known 8tree Damage Reporting Tool (DRT) automatically stitches the successive scans resulting in one large-area panoramic scan.

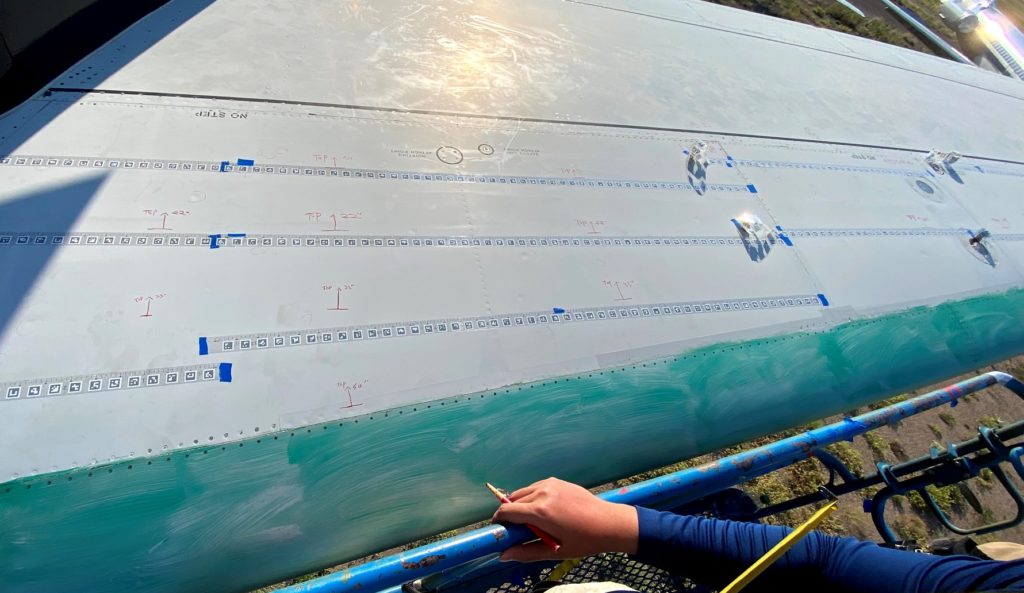
panoLite tapes applied on stabilizer to enable large area mapping of the whole area.

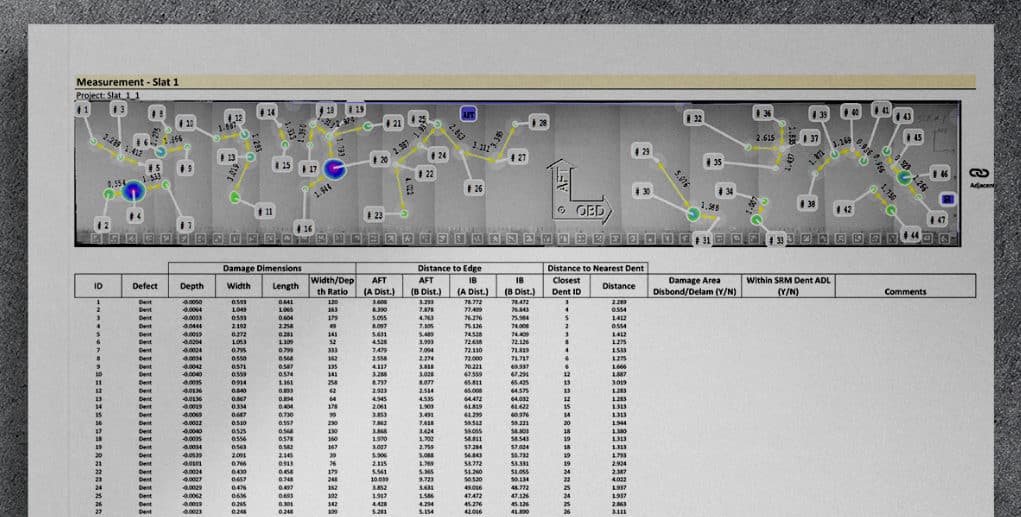
A comprehensive digital damage-report is generated as part of this automatic panoramic scan. The report format – familiar to most existing dentCHECK users – tabulates and itemizes each dent alongwith its key metrics, such as depth, size and inter-dent distance.

Part of an hail damage report (B777 – Slat).

End-to-end digitalized hail-damage reporting

The entire end-to-end digital process takes only a couple minutes, and equips operators and technicians with instantly-actionable damage-reports that guide informed repair strategies.

Does your organization still use slow, inaccurate and error-prone traditional manual methods to map catastrophic hail-damage?

If so, consider exploring the end-to-end digitalized dent-mapping workflow enabled by dentCHECK – a tool trusted by the leading airlines/MROs across the global aviation maintenance industry.

As for Elvis’ JetStar, after being parked for 35 years, it might not need hail damage-mapping anymore.


Contact us to receive the complete example report.
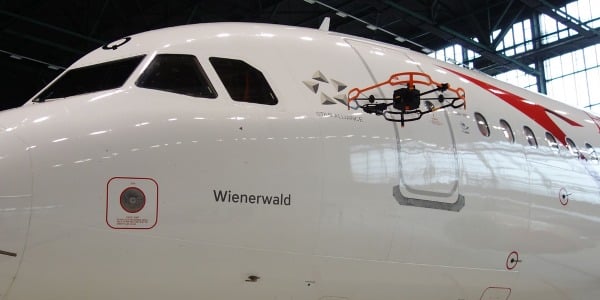
Donecle drone "flying dentCHECK" performing damage inspection on commercial aircraft

Proven Drone-Based Automatic Dent Inspection Maps an Entire Rafale Fighter Jet in Just One Hour

By Automation, Insights, Newsroom, Press

As featured in

In early 2020, the French Defense Innovation Agency launched a program in partnership with 8tree, Donecle and Dassault to explore automated drone-based dent-inspection of the Rafale military aircraft.

This press release was published on PRWeb.

flying dentCHECK

Donecle drone combined with 8tree’s 3D sensor — the flying dentCHECK.

The focus of this program was to develop an integrated solution comprising dentCHECK – 8tree’s 3D dent-mapping technology – onboard a Donecle drone, to enable automatic inspection of aircraft surfaces.

Tested on metallic and composite surfaces, this integrated ‘flying dentCHECK’ solution allows the comparison of new inspection results against the aircraft’s digital damage record.

The collaborative project was able to validate the technology at the French military base 118 in Mont-de-Marsan. Within one hour, the flying dentCHECK inspected dents and bumps of an entire Rafale fighter with accuracy of 0.1mm depth and 2mm size.

“It’s all about automating non-destructive testing tasks and procedures. The 100% automated flying dentCHECK drastically reduces the time taken to inspect an aircraft while improving the quality of maintenance operations significantly.”, says Erik Klaas, 8tree’s CTO.

Both 8tree and Donecle will be exhibiting at MRO Europe in Amsterdam, October 19-21. The flying dentCHECK will be showcased at Donecle’s booth #3080C, while 8tree will be demonstrating the latest dentCHECK features at booth #9059.

About 8tree

“We make precision 3D measurement as simple as taking a photo”
With this vision in mind, 8tree makes 3D optical surface inspection tools that solve chronic problems for multiple industries. 8tree’s products empower every operator – from mechanics on the floor, to engineers in the lab – with instantly actionable precise measurements, portability and performance. With its patented user-centric product design, instant ‘go/no-go’ answers and zero-learning curve, 8tree is committed to making precision 3D scanning more broadly accessible – technically and commercially.

For recent news follow 8tree on LinkedIn.


Press release initially published here —
English Version
German Version

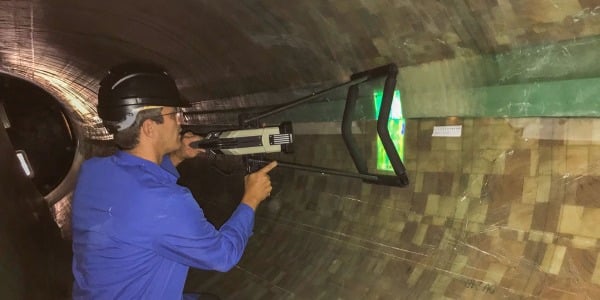
Inspection of Wind Turbine Rotor Blade with waveCHECK

8tree Contracts DNV to Certify waveCHECK™

By Insights, Newsroom, Press, waveCHECK

waveCHECK – 8tree’s latest innovation for rotor blade inspection in the wind industry gets certified according to DNVs standard for wind turbine rotor blades (DNVGL-ST-0376).

This press release was published on PRWeb.

One year after formally introducing waveCHECK into the wind industry, 8tree has engaged DNV for the product’s certification according to established industry standards.

“During the past swaveCHECK in use in wind turbine rotor blade manufacturingeveral years we have learned from stakeholders and experts in the wind industry, that waves and wrinkles in the load-carrying composite structure of wind turbine rotor blades are a critical problem,” said Erik Klaas, 8tree’s CTO. “The accurate and objective evaluation of waves and wrinkles helps blade producers build higher quality blades and reduce the risk of failure during operation. As the industry’s interest in waveCHECK continues to grow, we believe that obtaining DNV certification will be an important milestone on our journey to enabling the renewable energy market.”

“The improvement of quality and reliability of rotor blades is an important topic in the wind industry and we are happy to see that new technologies that support wind turbine blade manufactures are entering the market,” said Ramakrishna Parasarampuram, Head of Section Rotor Blades at DNV. “Certification of 8tree’s waveCHECK will include assessment of the system’s hardware, software as well as the scanning process itself and its boundaries.”


About 8tree

“We make precision 3D measurement as simple as taking a photo.”

With this vision in mind, 8tree makes 3D optical surface inspection tools that solve chronic problems for multiple industries. 8tree’s products empower every operator – from mechanics on the floor, to engineers in the lab – with instantly actionable precise measurements, portability and performance. With its patented user-centric product design, instant ‘go/no-go’ answers and zero-learning curve, 8tree is committed to making precision 3D scanning more broadly accessible – technically and commercially.

For recent news follow 8tree on LinkedIn, LinkedIn.


waveCHECK is a first-of-its-kind solution for end-to-end digital analysis of composite waviness. It empowers manufacturing teams to quantify composite waviness with unprecedented precision and repeatability.
waveCHECK detects and displays

  • Positive, Negative and Step waves & wrinkles
  • Highest point; shortest distance to edge, in main fiber direction
  • Aspect ratio
  • Angle of wave with respect to main fiber direction
  • Works on carbon fiber and glass fiber surfaces

Learn more about waveCHECK by watching this short presentation video.


Surface Inspection Technologies for Wind Turbine Rotor Blades – White Paper

By Insights, waveCHECK

Quality control of wind turbine rotor blades is complex and requires consideration of various aspects. Different inspection technologies are available. However, not every inspection technology is equally suitable for all aspects of wind blade quality.

This white paper outlines and explores the possibilities and limitations of different inspection methods:

  • Thermography
  • Shearography
  • Ultrasonic Testing (UT)
  • Expert Inspection
  • Optical Surface Inspection
  • Trends